How to Fix logo reels on Squarespace using Canva
In this article, we're going to be looking at how we can fix logos so they look nice and uniform, and consistent on our Squarespace websites. To do this, we’re going to be using Canva.
Some of the features we're using on Canva in this article are for pro subscriptions only. If you don't have a pro subscription, we really recommend it as you can utilize a wide range of tools to maximize your design needs. Click here to get started.
What is a logo reel?
Essentially, a logo reel allows us to demonstrate multiple logos alongside each other for third-party organizations, sponsors, charities, or other arrangements in a similar fashion. They can often be an integral part of the lead to conversion process where we're trying to entice a potential customer to get over the finishing line and sign up to a project, product, or service and so presenting third party logos to reinforce our clout within our industry is often very important.
Therefore, there's nothing more frustrating than when we see an array of logos that are designed to look entirely different being displayed in an inconsistent manner on our website. This is where a few techniques and a third-party editor like Canva can come into play.
In this coffee clip, we'll be taking you through all the steps needed to tidy up third-party logos using Canva so that you can present them in a beautifully uniform manner on your website.
Background color
First of all, we'll start with background color. Ideally, we want all of our logos to be on a consistent background color unless they are deliberately encapsulated inside a shape. For example, a logo that's encapsulated in a rectangle or square may well be intended to be presented in that way so we don't want to mess around with that.
But what if the entire logo is on a background color that's different from what we want to achieve, or it may be inverted. We may want to display all of our logos on a colored background to tie in with our website. We can also use tools in Canva to remove the background of images to switch your logos to appear on a transparent background meaning that as long as the contrast and balance are right and the logo is simple enough we may well get away with just a small change alone.
Step-by-step guide:

Canva’s handy background remover tool (for Canva pro subscriptions only)
Find the logos you are fixing and decide what you want to do with them (ie put them in circles)
Create a new design in Canva (you can use the preset logo design or a custom design of 500 x 500 pixels. It is recommended to do this with a square canvas.
Upload the logo image file into Canva and place it in the center of the canvas.
In this instance, we are aiming to have our logos on a white background.
Click on the image and select 'Edit Image'.
Use the background remover tool to remove the color from the background. This feature is only accessible for Canva pro users.
Download the images and upload them to your Squarespace site.

Changing the background color
It's as easy as that! The logo may be a bit fuzzy but the logos will be a lot smaller when you place them in a logo reel so you shouldn't have to worry too much.
If you wanted a background color other than white, you can simply:
Remove the background as above
Click the background tab on the left-hand side of Canva
Choose the background color by either using a preset color option or by using the ColorZilla Chrome extension (see below)

Using the ColorZilla Chrome extension
Using the ColorZilla Chrome Extension
Install the extension using the above link and then use the dropper tool to pick up the color to which you wish to match the background. Copy the hexadecimal value to the clipboard. Head to Canva and the background tab again and then click the color pallet and the plus button to add a new color. Paste the hexadecimal value in at the bottom and there you have it!
Inverting logos
Sometimes we may need to invert our logos so that we have a black variation of the logo on a white background or vice versa. This is where the duotone effect comes in really well and here's a quick step-by-step guide showing you how you can recondition logos using this tool.
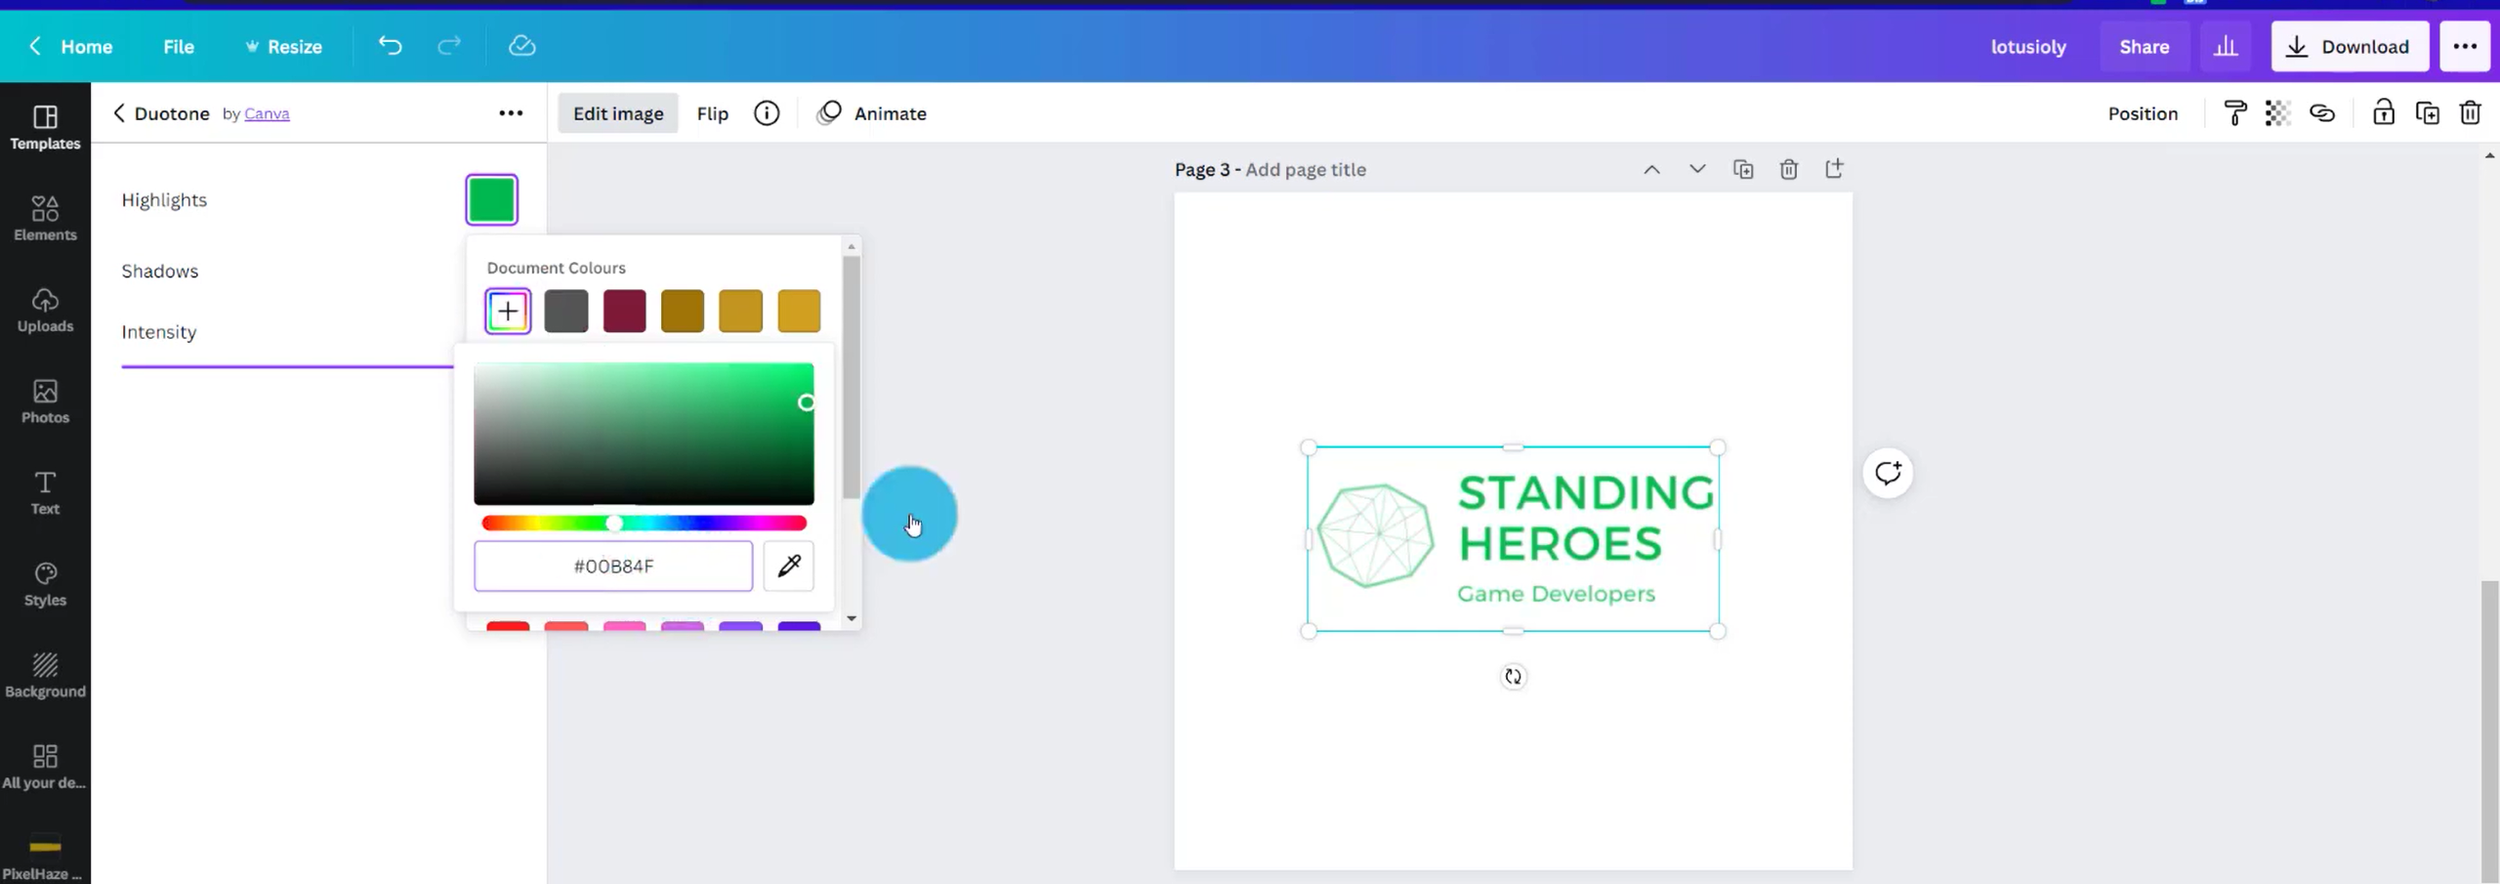
Using the duotone effect to invert our logo
Crop and center your logo using the purple guidelines and the crop tool
If your logo which needs inverting has multiple colors, duplicate the cropped centered image
With the first image, click 'edit image' and select the duotone effect
Click any duotone effect and click again to set the colors manually
For a white background with black text, set the shadows to white and the highlights to black (and vice versa for black background with white text)
If you need to match a color with the original logo, use the ColorZilla tool as described above, except this time, set the highlights to this hexadecimal value color (in the video tutorial we did this with the duplicated image)
If you are inverting a logo with two colors, drag the 2nd image on top of the 1st one and ensure both images are centered
Then crop both images so you have the text in one color (in this case black) and the logo feature in another color (in this case green)
Group the two parts together so that you can manipulate the size of both parts as one layer
Resize as appropriate
Download the images and upload them to your Squarespace site

Our logo which needs inverting

Our finished inverted logo
Adjusting the logo on a canvas background
Finally, we're going to look at our third editing option which is adjusting the logo in ratio to the canvas. We'll often find that the canvas for some logos will be vastly different from others. There are even instances where we'll have portrait logos, others in landscape, and others perfectly square. Making all of the canvases consistent then gives us more control over how the logo is placed on it and makes sure that we don't have vast inconsistencies from logo to logo.
To readjust your logo on a canvas background:
Set up Canva with a 500 x 500 pixel logo canvas
Centre align your logo
Use the handles at the side of the image to change the size proportionately so there is enough white space around the edges
Repeat with any other logos you are using
Download the images and upload them to your Squarespace site
This is a trial and error process as you may need to go back to Canva and readjust. Remember, you cannot adjust the size of the canvas in Squarespace and therefore using the image editor and changing the ratio there will leave you with cropping issues and inconsistent sizes in your logo reel.
Adjusting the logo in relation to the canvas
So there we have it, three tricks that should help you tidy up logos!
Of course, we're not limited to just logos alone, this can be used for multiple graphics, so you want to control how they work within transparent backgrounds or specific blocks to add to our website.
The biggest difference between using Canva and the Squarespace built-in editor is although the Squarespace editor is very handy and great for cropping photos or adjusting colors, contrast, and saturation, it's not the best for repositioning images on a canvas, mainly because there is no canvas adjustment feature within the software at present.
Therefore, if you aren't confident with Adobe Photoshop, don't want to pay the subscription for Adobe Creative Cloud, or indeed want to go through the steep learning curve of a very detailed professional software like Adobe Photoshop then Canva and this tutorial, could well be the solution for you.
Enjoy fixing your logos and let us know how you get on!


Sed purus sem, scelerisque ac rhoncus eget, porttitor nec odio. Lorem ipsum dolor sit amet.